Everything now seems to be digital and it's just so much easier to email photos or post images on Facebook & Twitter, Flickr & Photobucket or Picasa for friends and family and the whole world to see.
In fact, last week I actually went through a large box of old photos searching for a specific picture that I wanted to scan and upload to this very site.
Immediately after I did it, I though "hey, I should scan all my old photos."
This is a great idea. I could have all those old pictures on a hard drive and I can access them when ever I wanted. Then I remembered my son threw my last hard drive across the floor just to see how far it would travel. Surprisingly it wasn't very far as he was only a year old and it's a pretty heavy drive for a one year old.
Not surprisingly though, throwing it "not very far" can still cause the absolute most amount of damage possible.
Everything on it was lost.
My movies, my music and most importantly every photo of my son from the day he was born.
Thankfully I had a backup of all digital photos but as I said earlier - or should I say, as my mother said earlier - "nobody actually prints out photos anymore".
So here's a great reason to select a few digital pictures to print out before they all go kaput on some drive.
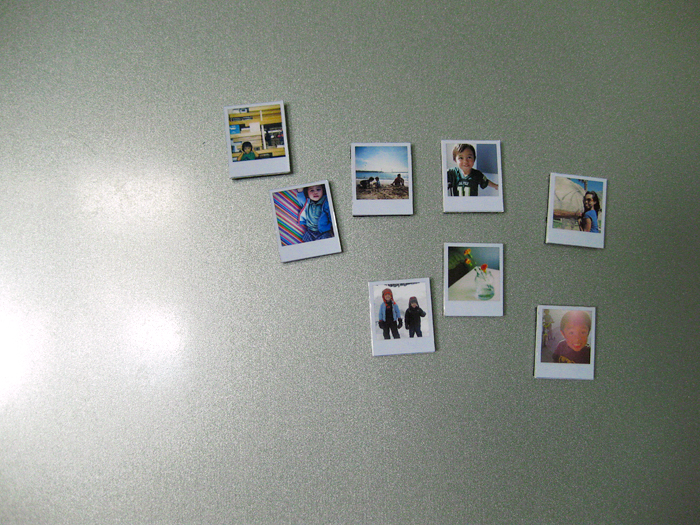
Mini Polaroid Magnets.
 |
| Image: Ambrosia Creative |
This tutorial comes courtesy of Ambrosia Creative who was inspired by this post at How About Orange.
She pretty much followed the tutorial with a few modifications.
What you'll need is:
1. A4 Photo Paper.
2. Craft/pva glue.
3. Craft knife.
4. Piece of cardboard (the back of a notebook/sketchbook) - preferably a used one.
5. Magnetic tape - you can get some from Arts & Crafts co. or check your local art supply shop.
6. A white marker or Tipp-Ex.
Using this link to a Polaroid frame, or just using the jpeg below, crop and scale down your digital photos to fit inside the frame.
Alternatively, you can use the photoshop template provided by Ambrosia Creative.

Jennifer then scaled her Polaroids down to about 0.8″ wide and then printed her selections on photo paper.
 |
| Image: Ambrosia Creative |
You should be able to pick up clear masking tape in any stationary shop.
Important: The paper glaze in the How About Orange tutorial won't work for this project as it will cause the ink in the photos to run and bleed.
Once the mini Polaroids were cut out, Jennifer used a white opaque marker from Martha Stewart’s craft line, and colored in the edges but you could use Tipp-Ex if you can't find an opaque marker at your art supply shop.
 |
| Image: Ambrosia Creative |
 |
| Image: Ambrosia Creative |
 |
| Image: Ambrosia Creative |
So, for the sake of my mother and little boys who like to throw hard drives.
Go get printing.
No comments:
Post a Comment